Effective Ways to Remove Soap Scum and Water Stains From Shower Doors

Posted on September 25, 2024 by

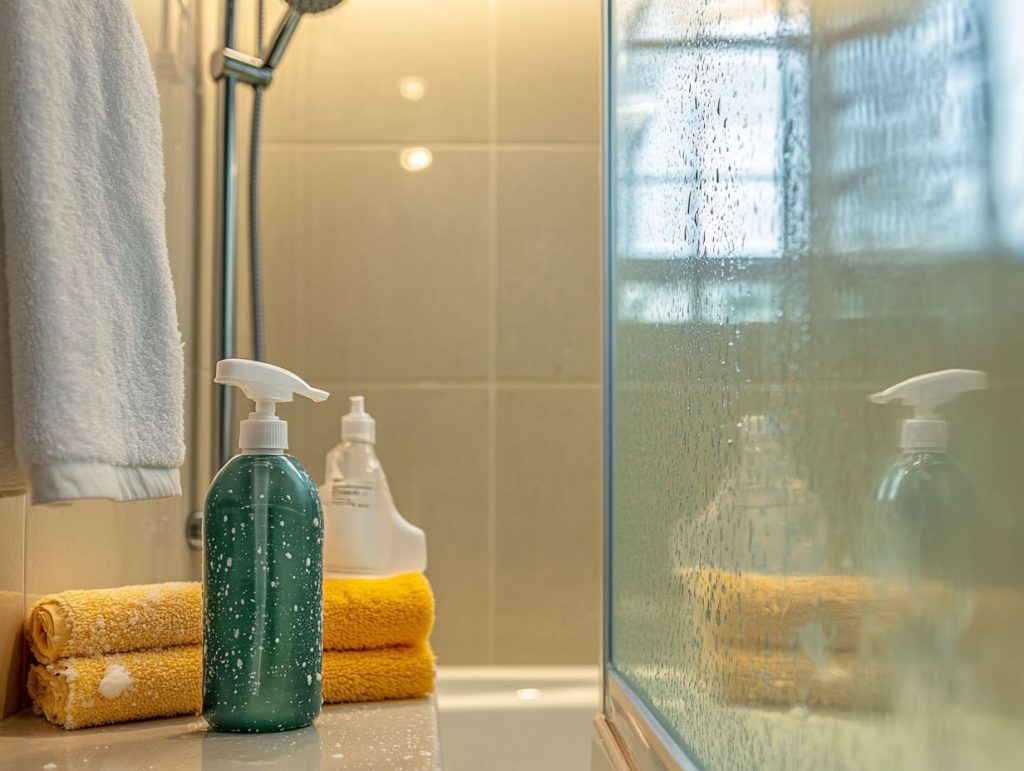
Struggling with soap scum and water stains on your shower doors? You’re not alone! These pesky marks can turn a pristine bathroom into an eyesore.

Understanding what causes these stains is the first step toward effective removal. This article explores various methods—from chemical cleaners to natural remedies—to help you restore your shower’s sparkle. It also shares preventive tips and alternative solutions for stubborn stains, ensuring your space remains fresh and inviting.

Soap Scum and Water Stains on a shower door

What Causes Soap Scum and Water Stains?

The main culprits behind soap scum and water stains are hard water and soap products that leave annoying residues behind after use, leading to that unappealing buildup over time. Hard water is laden with minerals like calcium and magnesium, and when it teams up with soap, it creates a sticky film that loves to cling to your shower doors and tiles.

This film doesn’t just ruin the appearance of your bathroom; it can also turn cleaning into a laborious task. When you reach for those conventional household cleaners, they often clash with the calcium and magnesium in the soap scum, which can make cleaning less effective or leave you with stubborn stains that refuse to budge.

So, consider introducing targeted products specifically designed to tackle these issues. Understanding your water quality is crucial; installing a water softener can make a significant difference if you’re dealing with high mineral content. Not only will it help keep your surfaces cleaner, but it can also extend the life of your plumbing fixtures.

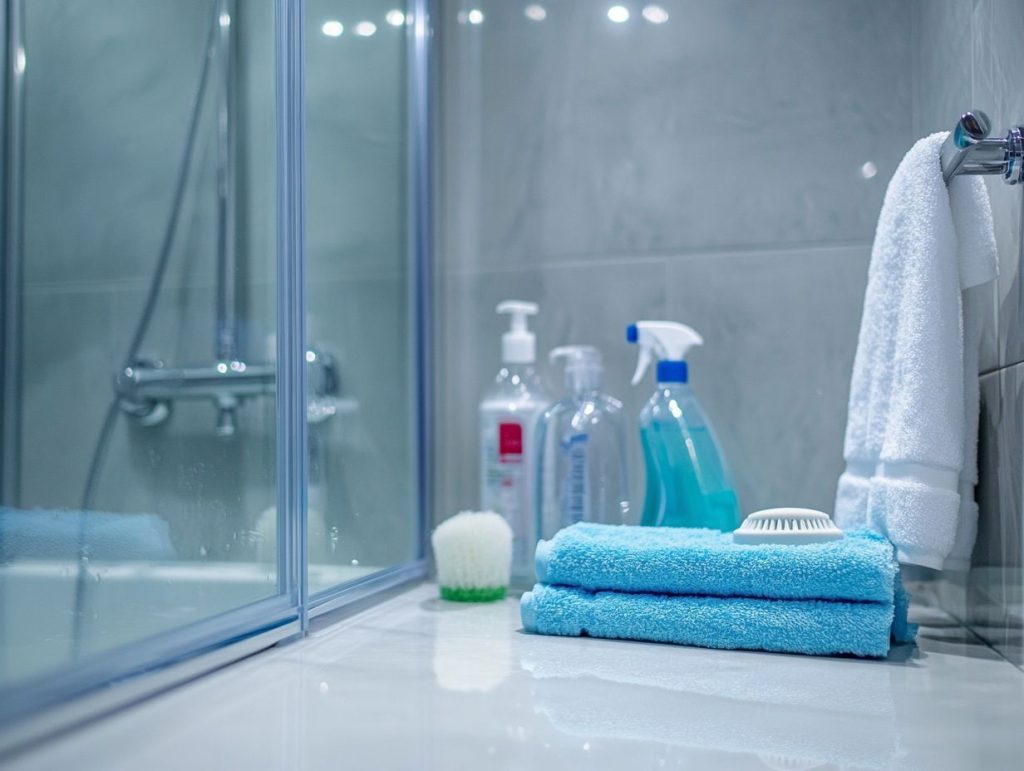
Common Methods for Removing Soap Scum and Water Stains

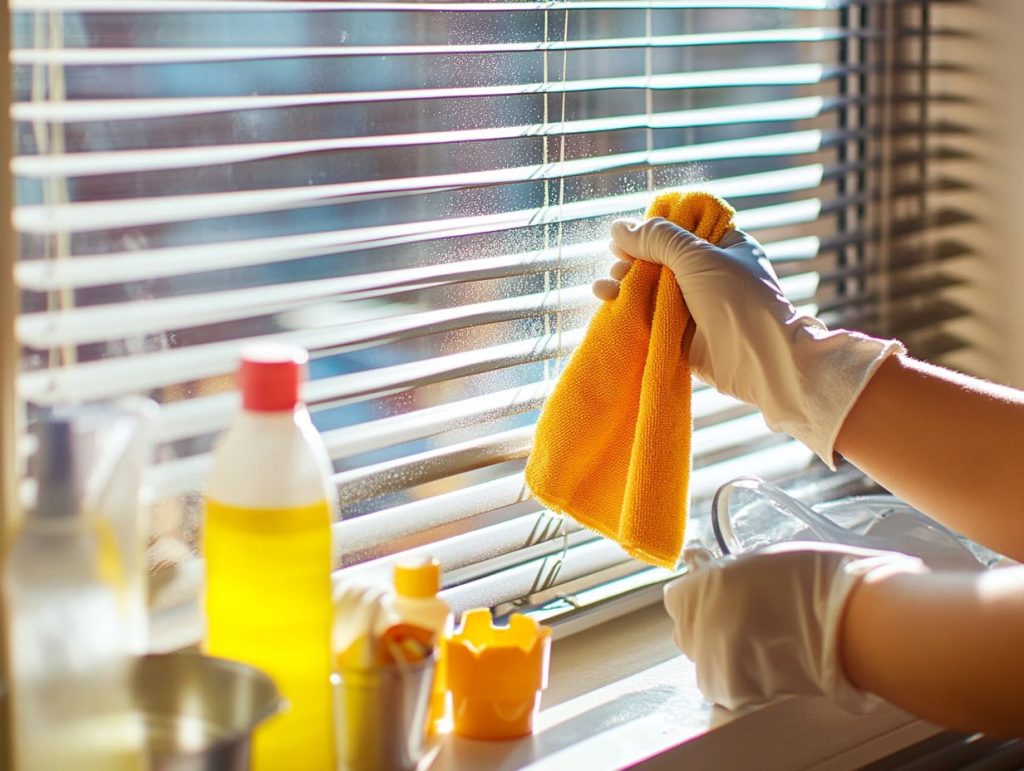
Regarding getting rid of soap scum and water stains, you’ve got a variety of cleaning solutions at your fingertips to restore shine to your bathroom fittings and surfaces. Whether you prefer eco-friendly options like vinegar and bicarbonate of soda or stick with commercial cleaners, each method has advantages for tackling stubborn stains and mineral buildup on your shower doors and tiles.

Chemical Cleaners

Chemical cleaners are often your go-to for tackling soap scum and stubborn water stains, especially those with powerful ingredients like phosphoric acid. These commercial cleaners can quickly dissolve mineral buildup and restore that streak-free shine to your shower doors and bathroom fittings.

Along with phosphoric acid, you might notice other active ingredients like bleach, renowned for its disinfectant properties, as well as citric acid and sodium hydroxide, which are excellent at breaking down grime.

When you use these products, read the labels for safety instructions. It’s important to ensure proper ventilation and wear gloves to protect your skin.

While chemical cleaners are highly effective, some people prefer natural remedies that often use vinegar or bicarbonate of soda. Admittedly, they take a little longer to show results. Still, they come with the safety benefit of avoiding harsh chemicals, making them a great choice if you’re aiming for a non-toxic cleaning environment.

Natural Remedies

Suppose you’re on the hunt for eco-friendly and non-toxic cleaners. In that case, you might be surprised at how effective natural remedies like vinegar, bicarbonate of soda, and lemon juice can be against soap scum and water stains. These household staples tackle tough stains and provide a safe cleaning option that’s kind to the planet.

Vinegar is your go-to hero here. Its acetic acid breaks down those pesky mineral deposits, making it perfect for fighting stubborn soap scum in your showers and sinks. Mix equal vinegar and water in a spray bottle, let it sit for a few minutes, and then wipe it clean. Easy peasy!

Then there’s bicarbonate of soda. This gentle abrasive can be sprinkled on surfaces to scrub away grime without scratching anything. Want to kick it up a notch? Mix it with some water to create a paste, and apply that to any problem areas.

And don’t forget about lemon juice! It’s like nature’s bleach and disinfectant rolled into one. Use it fresh or diluted to brighten surfaces and tackle odours.

Combining these remedies gives you a clean space and a home that smells fresh and inviting.

Preventing Soap Scum and Water Stains

To keep soap scum and water stains at bay, you’ll want to combine some effective maintenance tips with a regular cleaning routine. This way, your bathroom can remain spotless and shiny over time.

Simple preventative measures, such as squeezing after each shower, can work wonders. It will significantly reduce mineral buildup and help your bathroom fittings stay in great condition.

Simple Maintenance Tips

Simple maintenance tips make a difference in keeping your shower and bathroom fittings looking sharp while boosting hygiene. Setting up a regular cleaning schedule and using the right cleaning products can help you prevent soap scum and water stains from taking over.

To get started:

  1. Think about implementing a quick daily cleaning routine.
  2. Grab a squeegee and wipe down surfaces after each shower to tackle moisture build-up.
  3. Set aside some time each week for a thorough scrub, giving extra attention to the grout and corners where grime likes to linger.

Use products designed for specific materials, such as glass cleaner for shower doors and non-abrasive scrubs for tiles. This will give you the best results while keeping those finishes intact. Also, remember to regularly check and replace worn-out shower tools, like brushes and sponges.

By weaving these practices into your cleaning routine, you will have a sparkling shower and a hygienic environment that supports your overall well-being.

Professional Cleaning Services

Alternative Solutions for Stubborn Stains

Consider using specialised cleaning products and limescale removers when you encounter stubborn stains that won’t budge.

These products are designed to tackle tough stains and mineral build-up, making them a more effective option for those heavily soiled surfaces.

Specialised Cleaning Products

Specialist cleaning products, such as limescale removers and glass polishes, are your secret weapons against stubborn soap scum and mineral build-up. They’re packed with targeted ingredients that break down tough residues, leaving your shower doors and fittings pristine.

Take limescale removers, for example. They usually contain a good amount of citric or phosphoric acid, which are excellent at dissolving those pesky mineral deposits. Glass polishes often contain isopropyl alcohol to give you that streak-free shine you desire.

Specialist products can clearly provide faster, more impressive results compared to traditional cleaning methods, such as using mild soaps or vinegar solutions. Remember to keep safety in mind when using these potent cleaners; wearing gloves and ensuring good ventilation can help prevent irritation.

Following the manufacturer’s instructions is key to achieving the best results while ensuring your surfaces look great.

Professional Cleaning Services

If your soap scum and water stains are out of control and DIY solutions just aren’t cutting it, hiring professional cleaning services could be your best bet for a deep clean that gets the job done. These professionals use advanced techniques and top-quality products to restore your bathroom’s original shine.

They have a keen eye for detail, so you can be sure that even those pesky hard-to-reach spots, like behind the toilet or inside the shower grout, receive a thorough sanitisation. This precision makes your bathroom look fantastic and helps keep your space healthier.

Even if you regularly tackle bathroom cleaning, bringing in the experts can enhance your routine. They can deal with tough build-up, allowing you to focus on other areas of your home. Mixing professional cleanings with regular maintenance will make cleanliness a sustainable priority, giving you peace of mind and helping your bathroom fittings last longer.

Tips for Maintaining a Clean Shower

Keeping your shower clean isn’t just about how it looks; it’s also extremely important for hygiene and extends the life of your bathroom fittings. If you add some effective cleaning tips to your regular cleaning routine, you can keep your shower sparkling and free from soap scum and watermarks.

Daily Practices for a Spotless Shower

Incorporating daily practices into your routine can help you keep your shower spotless and reduce that pesky buildup of soap scum and water stains. Simple actions like rinsing surfaces after you use them and grabbing a gentle scrub brush can make a difference in maintaining your bathroom’s cleanliness.

Using a squeegee to wipe away excess water right after each shower can save you much time on those deep cleaning tasks later. Wiping down the tiles and glass with a microfiber cloth removes moisture and helps prevent mould and mildew from crashing the party.

Choosing cleaning products specifically designed for bathroom surfaces can enhance your cleaning routine while being gentle on your materials. By dedicating just a few minutes each day to these practices, you can enjoy a consistently hygienic and inviting shower space, keeping it in tip-top shape with minimal effort.

A Step-by-Step Guide to Cleaning Your Rental Property’s Blinds and Curtains

Posted on September 13, 2024 by

Keeping your rental property looking its best requires more effort than just applying a fresh coat of paint. Regularly cleaning your blinds and curtains is critical to creating a welcoming atmosphere and ensuring these often overlooked features last longer. This guide walks you through gathering the right supplies, preparing your space, and giving step-by-step instructions for cleaning different blinds and curtains.

You’ll also find some handy tips for keeping them clean so your property stays in top shape.

The Importance of Regular Cleaning

The Importance of Regular Cleaning

Regular cleaning in a rental property isn’t just about making things look nice; it’s essential for maintaining indoor air quality, keeping tenants happy, and promoting the overall health of everyone living there.

As dust, allergens, and grime build-up, a clean space boosts the home’s ambience and even increases the property value. Plus, a well-maintained environment can lead to better tenant retention and show that you, as a landlord, are committed to your investment.

This step-by-step guide will help you understand why regular cleaning is essential for tenants and landlords.

Gathering Supplies and Preparing the Area

Before you start the cleaning process, it’s crucial to gather the right supplies and prepare your area for a smooth and efficient experience. Consider organizing your tools—such as microfiber cloths, spray bottles, and eco-friendly cleaning solutions—and maybe whip up a checklist that outlines the steps you want to tackle.

By ensuring you have everything ready to go, you can boost your cleaning game, save some time, and get the results you’re looking for, whether you’re sprucing up blinds or curtains in your rental property.

What You Will Need and How to Prepare the Space

To ensure your cleaning session goes off without a hitch, start by gathering the essential tools:

  • Microfiber cloths.
  • A trusty vacuum cleaner.
  • Effective cleaning solutions like vinegar and detergent are tailored to the materials you’ll be dealing with.

Before you dive in, take a moment to prepare your space by dusting surfaces and clearing away clutter. This little prep work lays the groundwork for a successful cleaning routine in your rental property, helping you tackle various window treatments while keeping things neat.

Taking the time to gather specific tools will not only streamline your efforts but also amplify the results you see. Be sure to have:

  • A duster for those high spots,
  • A mop for your hard floors,
  • And a scrub brush for those stubborn stains.

Using multi-surface cleaners can lighten your load while having dedicated solutions for glass and wood ensures you won’t miss a beat. Remember, a clean space begins with an organized one; ditching unnecessary items can reduce dust and make each cleaning session way more efficient. You’ll find that the results are much more rewarding when all surfaces are accessible and prepped for a thorough scrub.

Step-by-Step Guide to Cleaning Different Types of Blinds

Cleaning Blinds

Cleaning blinds can be a breeze once you understand the different types and the best methods. Whether you have sheer, blackout, or vertical blinds, knowing how to care for them can extend their lifespan and keep them looking sharp.

From simple dusting to more thorough cleaning techniques, this guide has quick tips that will save you time while keeping your window treatments in top shape, boosting the overall look of your rental property.

Step-by-Step Guide to Cleaning Different Types of Blinds

This step-by-step guide is your ticket to cleaning different types of blinds like a pro. You’ll want the right tools and cleaning solutions ready for each material, whether fabric, vinyl, or wood. Start with a thorough dusting—grab a microfiber cloth and a vacuum with a brush attachment to remove surface debris before breaking out any cleaning solutions for stains or general upkeep. By following specific care instructions for each type, you’ll make them look great and extend their lifespan.

Once you’ve tackled the dust, assess the materials of your blinds to choose the best cleaning methods.

  • A gentle fabric cleaner or a mix of water and mild detergent works well for fabric blinds. Spray lightly and wipe with a soft cloth.
  • Vinyl blinds love a stronger vinegar and water solution; it tackles grime like a champ without harming the surface.
  • Regarding wooden blinds, keep the moisture to a minimum. A damp cloth and a specialized wood cleaner will help preserve their finish while removing that pesky dust.

And remember, regular maintenance—like giving them a quick wipe-down each week—can save you from major cleaning marathons down the road.

Dust removal for horizontal blinds

Cleaning Curtains

Cleaning your curtains is vital to keeping your rental property looking its best, and knowing the different types of curtains can help you choose the right cleaning methods.

Whether you have sheer or thermal curtains, each type has essential care instructions for preserving its fabric and style. This guide will walk you through cleaning, ensuring your curtains stay fresh, are free from allergens, and look great.

Step-by-Step Guide to Cleaning Different Types of Curtains

This step-by-step guide is here to help you clean different types of curtains effectively, ensuring your tools and cleaning solutions match the fabric type. Start by grabbing a vacuum cleaner with a brush attachment to dust them off. Don’t forget to check the care labels to find out the best washing method—whether that’s hand washing, machine washing, or relying on dry cleaning services. By following these steps, you’ll keep your curtains looking great and boost the comfort and ambiance of your rental property.

Next, gather your supplies. Depending on the fabric you’re working with, you might need fabric-specific detergents, soft cloths, or a steam cleaner. Always choose tools that won’t cause damage—gentle brushes are perfect for delicate materials.

After washing, it’s key to dry the curtains properly. Air drying is usually the safest route, but if you use a dryer, ensure it’s on a low heat setting to prevent shrinking or damaging the fabric.

Regular maintenance can help prevent dirt and allergens from building up, keeping the atmosphere fresh and inviting for your guests.

Tips for Maintaining Clean Blinds and Curtains

Keeping your blinds and curtains clean isn’t just about that first scrub; it’s about taking preventative measures and following consistent maintenance tips to keep them looking great.

Regular dusting, occasional deep cleaning, and organizing your window treatments boost their looks and shield them from wear and tear, sun damage, and fading.

By following these handy tips, you can ensure that your rental property always looks its best and keeps your tenants happy.

Preventative Measures and Maintenance Tips

Preventative measures are your best friends when keeping your blinds and curtains clean and lasting longer. Regularly inspecting them can help you spot any issues before they become big problems. Simple things like dusting them weekly and taking care of minor repairs can save you from replacing your window treatments altogether, which is a win for your investment property.

By being proactive about maintenance, you can keep your rental looking nice and create a comfortable space for your tenants.

Using a gentle, non-abrasive cleaner during your routine cleanings can prevent buildup that leads to more significant damage down the road. It’s also important to encourage tenants to report signs of wear or malfunction immediately since even small issues can escalate if ignored.

Regularly checking for frayed cords or loose brackets helps ensure your window treatments work properly, boosting safety and appearance. Ultimately, putting in the time with these preventative strategies extends the life of your blinds and curtains and shows that you care about your rental property, helping to build positive relationships with your tenants.

Top Cleaning Tips for Tenants Moving Out of a Rental Property

Posted on August 19, 2024 by

Moving out of a rental property can be exciting and daunting, especially when cleaning. Having a solid plan is crucial to ensure you leave the space spotless and receive your full deposit back. This guide provides:

  • Practical tips for creating a cleaning checklist.
  • Tackling specific areas like the kitchen and bathroom.
  • Dealing with tough stains and lingering odors.

With these tips in your back pocket, you’ll be ready for a successful move-out cleaning.

Preparing for Move-Out Cleaning

Preparing for Move-Out Cleaning

Preparing for move-out cleaning is crucial for you as a tenant. It ensures your rental property is in sparkling condition, meets all your lease obligations, and keeps your property manager happy.

A solid cleaning strategy streamlines the process, allowing you to tackle all those cleaning tasks organizationally. Plus, creating a cleaning checklist before your move-out date is a game-changer. It helps you gather all the necessary supplies and keeps you on track during the cleaning hustle, setting you up for a successful move-out inspection.

Creating a Checklist and Gathering Supplies

Creating a thorough cleaning checklist is your secret weapon when preparing to move out. It ensures you don’t miss any details while tidying up your rental property. With a well-organized checklist, you can track your progress and prioritize tasks, making the cleaning process much more manageable as you approach your move-out date.

Break down the property into specific areas like the kitchen, bathrooms, bedrooms, and living spaces to kick things off. Within each section, jot down the must-do tasks, such as:

  • Scrubbing surfaces
  • Dusting
  • Vacuuming
  • Sanitizing appliances

Don’t forget to gather some quality cleaning supplies. You’ll want to have on hand:

  • All-purpose cleaners
  • Glass cleaners
  • Disinfectants

Also, grabbing tools like microfiber cloths, mops, and scrubbers will seriously boost your cleaning game. By staying organized and methodical, you can make sure each item on your checklist gets tackled, setting you up for a confident final walkthrough that shows you’re all about leaving the place spick and span.

General Cleaning Tips

Implementing general cleaning tips is critical to getting your place in tip-top shape for that move-out inspection. This way, you’ll meet your tenant’s responsibilities and align with your lease agreement’s expectations.

By using effective cleaning techniques, you can turn your rental into a tidy and welcoming space that will surely impress the property managers during the final walkthrough.

Cleaning Different Surfaces and Materials

Regarding cleaning different surfaces and materials in your rental property, using effective techniques tailored to each surface is essential for a thorough and efficient cleaning process that meets those move-out expectations. Knowing the best cleaning products and methods will help you achieve that spotless finish and keep the property in top shape, whether dealing with floors, walls, countertops, or appliances.

Focusing on common surfaces like carpets, hardwood floors, and various appliances will make your cleaning process much more manageable. For carpets, you can start with a vacuum cleaner and then follow up with a carpet cleaner to lift stains and refresh the fibers. A gentle sweep and a damp mop do wonders regarding hardwood floors, especially when using pH-neutral cleaners that protect the finish.

A simple mix of vinegar and baking soda works like magic in the kitchen and bathroom to degrease and disinfect appliances. Remember that attention to detail is critical; tackle corners, baseboards, and those hard-to-reach spots. A high standard of cleanliness meets your lease requirements and leaves a great impression.

Specific Areas to Focus On

When going through your move-out cleaning process, it’s crucial to focus on specific areas to ensure every corner of your rental property is left in tip-top shape. You want to meet both your landlord’s cleaning standards and your expectations.

You can tackle the most visible parts of the home by prioritizing high-traffic zones like the kitchen, bathroom, and living spaces. Your cleaning efforts will pack a punch!

Kitchen, Bathroom, and Living Spaces

Focus on your kitchen, bathroom, and living spaces when you’re gearing up for a move-out cleaning. These areas make a difference in how clean and appealing your rental property looks. Getting these spaces sparkling clean fulfills your tenant’s responsibilities and leaves a great impression on your property manager during that final inspection.

When you’re in the kitchen, consider using multi-surface cleaners to tackle sticky residue on countertops and stovetops. A vinegar and baking soda mix can work wonders for those hard-to-reach stains in the sink.

Don’t forget to disinfect high-touch areas like faucets and light switches in the bathroom. A good disinfectant spray is a must-have for this task.

As for your living spaces, take a systematic approach—start by dusting surfaces and then move on to vacuuming carpets to ensure you don’t overlook any corners. Using some storage solutions can help you declutter and create a neat appearance.

Remember, being thorough in these high-usage areas showcases your cleaning skills and helps maintain the space’s overall integrity.

Dealing with Tough Stains and Odors

Dealing with Tough Stains and Odors

Dealing with tough stains and odors in your rental property can be a major headache, but using the right cleaning techniques and products can improve the situation and help restore your space to its original condition.

Whether wrestling with stubborn carpet stains or getting rid of those lingering appliance odors, knowing how to tackle these issues effectively is key to a smooth move-out cleaning experience.

Effective Cleaning Techniques

Utilizing effective cleaning techniques is key for you to successfully remove stains and odors while keeping your rental property looking spick and span. Using the proper methods and cleaning products for different surfaces can boost your cleaning efficiency and maintain a sparkling clean environment.

For instance, a simple vinegar and water solution can work wonders on glass and stainless steel, leaving those surfaces streak-free and gleaming. And don’t underestimate the power of microfiber cloths—they’re excellent at trapping dust and dirt on everything from wooden furniture to electronic devices.

It’s also super important to tackle spills immediately by blotting instead of rubbing. This little trick can save you from those stubborn stains that like to set in. Regular maintenance, like vacuuming carpets and upholstery and placing mats at entryways, can help reduce odors and stains.

Feel free to experiment with eco-friendly cleaners or homemade solutions to find what works best for your cleaning challenges. You’ll end up with an environment that feels fresh and inviting!

Final Touches and Inspection

Making those final touches during your move-out cleaning is essential to ensure that your rental property meets the expected standards for the move-out inspection. Reviewing your cleaning checklist and tackling any areas you might have missed can boost the property’s cleanliness and improve your chances of getting your security deposit back in full.

Ensuring a Successful Move-Out Cleaning

Adhering to your lease agreement’s cleaning expectations and requirements can ensure a successful move-out cleaning, which can make your property inspection process much smoother. Suppose you focus on cleanliness and pay attention to the details. In that case, you can leave your rental property in fantastic shape, which goes a long way toward maintaining a positive landlord-tenant relationship.

To nail this, fully understanding what’s expected in your lease is crucial. Some agreements might specify cleaning tasks or even provide a handy checklist to make your life easier. This usually covers deep cleaning carpets, scrubbing kitchens and bathrooms, dusting surfaces, and ensuring appliances are sparkling clean.

Property managers typically appreciate when you take the initiative to document your cleaning efforts. It helps foster communication and builds trust between you and your landlord. Reflecting on your cleaning approach lets you spot areas needing extra TLC, ensuring every nook and cranny is pristine. This way, you’ll make a great impression on your landlord during the final inspection.

Reduce The Chance of Tenancy Deposit Clawback Due To Cleaning Issues

Posted on November 13, 2020 by

Cleaning Supplies

Part of the End of Tenancy Cleanup is the garden/grounds clearance of any litter, junk, verandas and decking must be power washed, free of stains and damage. While we cannot do much about any damage you may have caused we can certainly take care of any issues outside of your rented property.

We can deploy our super powerful jets to pressure wash any surfaces including wooden decking and limestone tiled patios in your backyard. An optional service is junk removal where we send one of our waste collection and disposal trucks to remove any pieces of furniture, vegetation or any items that are found within the external boundaries of your home.

Why risk your hard earned money being deducted from your tenant’s deposit just because you did not clean your rented property professionally at the end of your tenancy? Is it worth it? I don’t think so.

Cleaning Maid

Hiring a professional end of tenancy cleaning company pays off big time. Seasoned experienced cleaners know what to clean and how to take care of all those details on the inventory checkout report. The end result is a happy landlord and money coming back to you. Sweet.

Bear in mind that these deep cleans do not come cheap however they are well worth the investment. In the end you get more money as a return on your investment as the deposit you have paid to the letting agent comes back unscathed.

But why not clean yourself? Well, did you know that the time and hassle vacuuming, dusting, polishing, mopping and detailing is simply not worth trying. And you didn’t know you had to clean inside the washing machine powder drawer, did you?